Usually, a power internet user receives and sends a lot of mails and for him/her, email is a priority task but unfortunately, with time inbox gets cluttered. Mails from various senders, newsletters, notification mails, business & work mails, personal messages – all clog up our inbox. Hence we need to organize our inbox in a better and neat way into separate labels/folders so that we could focus on the priority mails with urgency and read newsletters and other mails at leisure. Gmail has a pretty smart feature called filter which allows us to sort all mails automatically into separate labels/folders based on certain matching criteria we set. So, here in this post, we’ll see how to create filters in gmail so that we can organize our mails the way we want to.
How to create gmail filters to organize inbox
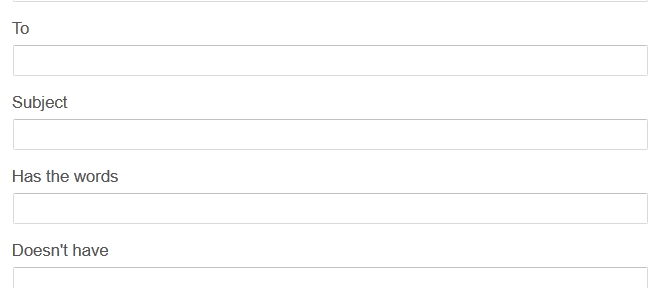
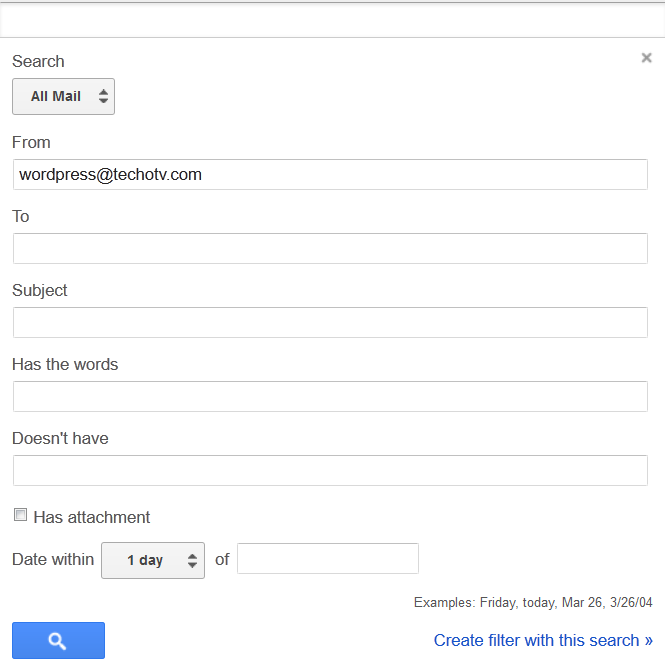
- Log into your gmail account. Now in the email search box, at its right, you’ll see a drop down arrow. Hit it to bring the advanced search options.
- Now Enter the search criteria for which you want to set filters or a different folder. For example – In the From field, you can specify list of email addresses separated with comma to filter mails from those senders into a different label/folder.
- To Understand what search criteria to enter, just read a few mails of similar category or kind which you want to keep under a separate label. Take out the common elements(sender’s name or subject line ) or common matching text that are present in all those mails of one kind.
- For example – If you receive frequent notifications from your web server, you may want to filter those mails to another label. For wordpress bloggers, they may want to fill in the From field – ‘wordpress@yourdomainname’ so that all comment moderation and other notifications from your wordpress blogs sit into a wordpress label/folder in your gmail account.

- Or You can sort all notifications and mails from facebook into separate facebook folder by creating filter with the following terms in Has the words field – “Facebook, Inc. Attention: Department 415 P.O Box 10005 Palo Alto CA 94303” .
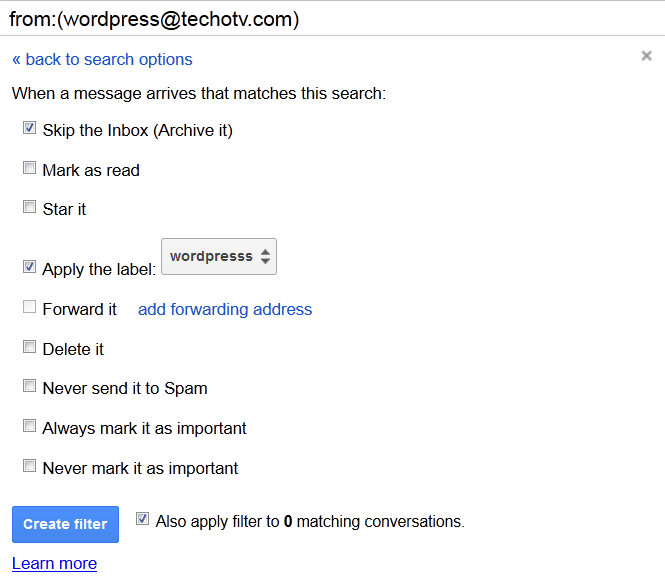
- Now After entering the desired criteria in the step above, click on ‘create filter with this search’ located at the bottom. It’ll then ask you a few more questions. Just tick them as required or follow my advice here : Check Skip The Inbox, Tick Apply the label and hit on choose label – New – then enter the name of the new label. Check ‘Also apply filter to x matching conversation’. Then click on Create Filter. Done! See the example screenshot below.

Now, organise your mails and work on priority basis which would further help you increase your productivity and fun. It is said, Organized living is always full of life.
